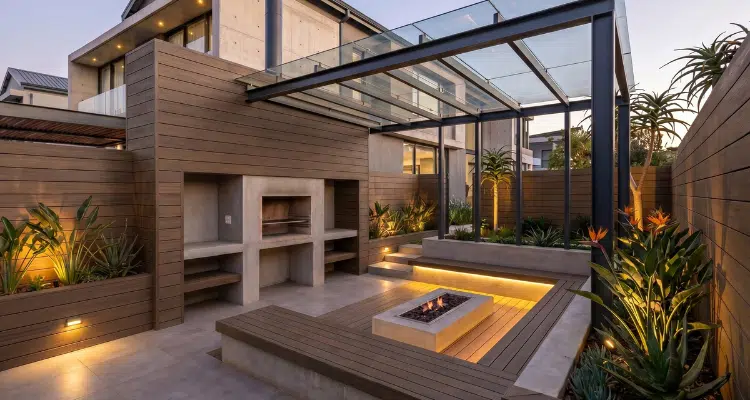
Discover The DIY Path To A Personalised, Stylish Outdoor Space By Installing Decking Boards Yourself
Composite decking boards have gained immense popularity in recent years thanks to their durability, low maintenance, and attractive finish. If you’re considering upgrading your outdoor space with composite decking, installing it yourself can save you some money while providing a sense of accomplishment.
Follow The Below Step-By-Step Guide & Tackle This Rewarding DIY Project.
1. Plan Your Deck Design
Before beginning, carefully plan your deck’s size, shape, and design. Measure the space where you’ll install the decking and sketch a layout to determine the placement of boards, joists, and any other structural elements. Consider features like stairs, railing, or a pattern for the decking boards.
Pro Tip: Ensure your plan adheres to local building codes and regulations.
2. Gather Tools and Materials
Below is a list of what you’ll need:
- Tools: Drill, circular saw, measuring tape, level, chalk line, screws, and a rubber mallet.
- Materials: Composite decking boards, fasteners (hidden or exposed), joists, and any accessories like trim boards or fascia.
- Safety Gear: Don’t forget safety goggles, gloves, and ear protection when using power tools.
3. Prepare the Surface
A solid foundation is key to a long-lasting deck. If you’re building from scratch, construct a strong frame using pressure-treated wood or metal joists. Ensure the ground underneath has proper drainage to avoid water pooling and use gravel or landscape fabric to reduce weed growth and improve water flow. Use a level to confirm your frame is even as uneven surfaces can lead to issues later.
4. Install the First Board
Start with the first board at the edge of the deck. Secure the board using fasteners, ensuring it is flush with the frame. If you are using hidden fasteners, follow the manufacturer’s guidelines for attaching clips or screws. Leave a small gap (typically 3-5mm) between the board and any fixed structure to allow for expansion and contraction.
Pro Tip: Use a chalk line to ensure your boards align perfectly straight.
5. Lay Subsequent Boards
Work your way across the deck, installing one board at a time. Use spacers to maintain consistent gaps between boards for aesthetics and drainage. If your deck design includes patterns, measure and cut boards carefully before installation.
6. Trim and Finish
Once all boards are installed, add trim or fascia boards to cover the edges of the frame for a polished look. Use a circular saw to trim any uneven ends and secure the fascia boards with screws or adhesive, depending on the material.
7. Inspect and Enjoy
Finally, check the entire deck for loose boards or fasteners. Make any necessary adjustments to ensure safety and stability. Once satisfied, give your deck a good cleaning to remove dust and debris left over from the installation process.
Additional Tips for Success
To ensure your composite decking project is smooth and results in a high-quality finish, keep these additional tips in mind:
- Follow Manufacturer Guidelines
Each brand of composite decking has specific recommendations for installation, which may include details on fasteners, spacing, and board orientation. Adhering to these instructions helps maintain the structural integrity and longevity of your deck. Incorrect installation can void warranties and lead to issues like warping or splitting.Pro Tip: Keep the installation manual handy or visit our website for video tutorials and troubleshooting advice.
- Temperature Considerations
Composite boards expand and contract with temperature changes, so it’s crucial to account for this during installation. Ideal installation conditions are moderate temperatures (15–25°C), as extreme heat or cold can alter the boards’ size temporarily. Spacing is also key. Use spacers to maintain consistent gaps between boards. These allow for natural movement without causing buckling.Pro Tip: Avoid installing composite decking during the hottest part of the day, as the boards may shrink overnight, leaving gaps.
- Hidden Fasteners
Hidden fasteners not only enhance the deck’s visual appeal but also protect against potential snags or injuries caused by exposed screws. They provide a seamless, screw-free finish for a clean and modern look and minimise the risk of water pooling around exposed screws, which could lead to long-term damage.
Hidden fasteners often require clips or brackets that slide into grooves pre-cut in the boards. Ensure you have the correct type of fastener for your decking brand.Pro Tip: Invest in a starter kit for hidden fasteners, as this typically includes all the necessary components and tools for easy installation.
- Cutting Board
Composite decking boards require precise cutting for a professional look, especially around edges, stairs, or custom designs. To do this, use the right tools and equip a fine-toothed saw blade designed for cutting composite materials to avoid splintering or rough edges. A mitre saw can be especially useful for accurate angled cuts. Don’t forget to wear protective goggles and gloves when cutting, as composite materials can produce fine dust.Pro Tip: Measure twice, cut once! Mistakes can be costly, so double-check your measurements before making cuts.
- Allow for Ventilation
Proper ventilation under your deck is crucial to prevent moisture buildup, which can lead to mould or mildew. Install decking perpendicular to joists to promote airflow and prevent water from pooling. Leave clearance and ensure there is at least a 2-inch gap between the ground and the bottom of the frame.
By following these additional tips into your project, you’ll ensure a smooth installation process and enjoy a beautiful, long-lasting deck that’s as functional as it is stylish.
In conclusion, taking the DIY route might seem daunting at first, but with careful preparation, patience, and attention to detail, you’ll gain the satisfaction of completing a project that adds long-term value to your home. Beyond that sense of accomplishment, building your deck yourself also offers the opportunity to customise it exactly to your preferences, ensuring that every board reflects your unique style.